This post may contain affiliate links, meaning if you decide to make a purchase via my links, I may earn a commission at no additional cost to you. See my disclaimer for more info.
If you’re in the process of setting up your Airbnb listing, it can be super overwhelming to know every single thing you will need. I have been there and created this Airbnb host checklist to support hosts like you when trying to set up their listing.
This Airbnb hosting guide includes a lot of details for aspiring, new or experienced hosts. I have found that having a checklist by other hosts can be so helpful in identifying what I may have missed since there’s many things to buy and set up for an Airbnb property. Read below for the most comprehensive vacation rental host checklist on the internet.
This post is all about Airbnb host checklist.
The Most Comprehensive Airbnb Host Checklist
This checklist assumes you have already identified and purchased or leased a property that you will be listing on Airbnb.
1. Pick your Airbnb themes
Your Airbnb theme will inform all your design choices throughout your listing. Everything from the brand of shampoo to the Airbnb kitchen essentials you choose. This will also help clarify the type of work that needs to go into the property. Do you need new paint or bigger projects like adding amenities that require a contractor?
We have a great guide for hosts trying to come up with an Airbnb theme and a complete guide to Airbnb kitchen essentials!
2. Add large amenities
This is going to be the longest part of your set up and most expensive. Using sites like Airdna.co can really help to ensure you’re spending money on the right amenities. The other, cheaper way, to ensure you’re investing in the right amenities is to do the enemy method on other listings in your market. Look at the “Guest Favorite” listings and write down all the amenities. The ones that keep reoccurring from listing to listing are going to be the ticket to add to your property.
3. Start your listing on Airbnb
There’s so much that goes into setting up a listing on Airbnb and VRBO. The earlier in the set up process that you start your listing, the better. This is going to give you clarity into what is needed to hit certain metrics for being a quality listing. You can see what amenities you will get credit for on Airbnb and what Airbnb essentials are needed.
To learn more about being prepped with Airbnb essentials, read this article!
4. Pick your software stack
This is largely going to be informed by what kind of short term rental business you want to build. If this is your first listing, everything you need is in Airbnb and I would encourage you to start with that one platform. Contrary to popular opinion, I would not add your listing to VRBO right away. You can find out how guests primarily book their vacation rentals in your market on Airdna.co. If majority is through Airbnb, just focus there first.
For medium size to larger size businesses with more than 4 listings, here’s my favorite tech stack:
- Guesty for PMS
- Pricelabs for dynamic pricing
- Turno for scheduling cleaners
- Instacart for supply restock & smoothing over guest issues
5. Hire your local team
This includes cleaners, handyman, landscapers, pool cleaners and anyone else you need to help manage your property.
6. Purchase all your furniture
The fun part! Since you have your Airbnb theme done, you can purchase all the furnishings for your property. I have heard great things about Minoan but have yet to personally use their services.
7. Purchase all linens and towels
Whether using a service like Minoan or going directly through local retailers, now’s the time to purchase all those basics. Include your cleaner on this conversation as they will be able to tell you how many of each item to stock and whether or not the quality is going to hold up with multiple turnovers.
8. Purchase everything else
Happy shopping!
9. Schedule your set up dates
I find it best to gather everything you need at the property first. This way handymen and other contractors needed for set up can be there on set up and your money goes further. You will need 2 days per 1,000 sq feet for set up in my experience.
10. Hire any professionals for those dates
Have the first half of set up just be your immediate team and then schedule your contractors and handyman for the second half.
11. Complete set up
Get after it!
12. Finish your Airbnb listing
At this point you should be able to check off every necessary item for amenities set up on your Airbnb listing. Do not go live at this point because you do need professional photos.
13. Finish out your software set up
Plug in all your softwares to your Airbnb listing.
14. Walk through and make a list of all quirks about the property
This is SO important for guest experience. Make sure you note everything and anything that could throw off a potential guest. Quirks that are plainly obvious and a nuisance, try to fix. If they can’t be fixed, put them in your listing description. For others, just put a note down because you will want to call out how to use to your guests to avoid multiple texts and calls during their stay. Think about three way switches, garage door openers, fire pits, pool heaters, jets for a jacuzzi, how to turn on the shower, how to turn on the TV, light troubleshooting on WiFi, etc.
15. Create signs addressing those quirks
These 4×6 acrylic signs are my go-to for putting up signs throughout a listing. Canva is the best spot for designing these templates and getting them printed.
16. Set up high speed internet
You definitely want to have the best internet with high speeds for the amount of guests, TVs, gaming consoles, workstations, etc. your listing provides. The guests will expect this and you do not want to disappoint them with a slow connection. Pay for premium here!
17. Install security cameras
Airbnb has strict security camera rules and it’s so important to disclose where these are located on your property. I only have a door bell camera to be able to time stamp arrival, departure, cleaners and other service people entering and exiting. It also will allow you to communicate with your guest through the camera with any issues upon check in.
Now, do not be weird about your security camera and obsessively check it. Just have it there as a tool in case you need it but leave your guests alone, they are on vacation!
18. Install Smart lock
It’s the 2020’s you need to have a Smart lock. Do not make your guests pick up a key or use a lock box! Airbnb can now integrate with your smart lock and support the check in code process. How amazing!
Having a lock box with a back up key is so important. In case the lock dies or breaks, the key will be super handy with smoothing over this guest issue.
19. Have a cleaner walk through
Walk through the property with your cleaner to get a firm quote and set expectations on turn overs. They can give you advice on how they want the supply closet set up and back up linens stored. They will also need you to point out all features and amenities that they need to clean. Agree on a check out list for your guests with your cleaner.
20. Have a handyman walk through
Also, a very important appointment. You need to set expectations for response times and clear expectations for ongoing maintenance.
21. Create your Welcome Book
Now that all your vendors are set up, you can create your Welcome Book with all important information for your guests and recommendations of what to do in the area! Be sure to include check out times and Airbnb checklist for guests check out instructions so they can clearly see and follow the requests.
22. Set up your supply closet
According to your cleaners instructions, set up your supply closet and fully stock it. Airbnb host checklist for cleaning is so important here. Laminate it and put it in the supply closet for your cleaner.
23. Hire your photographer
The fun part! You want to get a photographer that is experienced with short term rentals and Airbnb listings. I have made this mistake in the past and it was not ideal when setting up my listing. You will want some life style shots and ensure they understand these are listing and social media photos so time spent on this listing is going to be super important.
24. Stage your listing
Prior to your photo shoot, you will want to get it staged for photos. Pull out all the lawn game, start up the fire, having something cooking in the kitchen and have fun!
25. Get photos taken and include lifestyle shots
The best part! Do this with your spouse and kids and make the most of it!
26. Add photos to all your listings
Pick your first 5 photos WISELY. These are the ones that make the biggest impression on a guest when they are searching listings!
27. Go live!
Click publish and wait for the bookings to come in! If you started a social media account for your listing, paying for some ads to boost your listing to you ideal guest would be a great investment.
28. Host your first guest
So scary but so so fun! Tell them they are the first and make them feel incredibly welcome!
Make sure you thank your guests at every point during their stay! Read this article to learn more.
29. Ask for critical feedback
This is different than a review. This is you asking your guests directly for feedback on their experience and asking pointed questions.
30. Tweak based on that feedback
Now, you need to actually take the feedback and adjust based on what they said. It’s best to get this out of the way immediately so you don’t have it show up in more reviews later down the road.
31. Increase prices as you gain more 5 star reviews
The best part about this business is the dynamic pricing! You can earn more as you gain more reviews and establish your business as a great hospitality brand in the community.
This post was all about Airbnb host checklist.
This post may contain affiliate links, meaning if you decide to make a purchase via my links, I may earn a commission at no additional cost to you. See my disclaimer for more info.

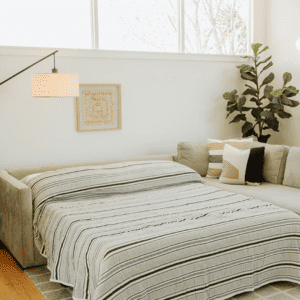
[…] can check out my Airbnb host checklist here for an in-depth look at setting up a killer listing! I also have a great post on putting your house […]